Troubleshooting
- No power
- The battery is discharged.
- Be sure the device is connected to charger or PC properly when charging.
- Bluetooth paring does not work well.
- Switch Bluetooth off and on again on your smartphone, then pair with the device in the smartphone’s settings.
- Turn on the device and try pairing again in 5 seconds.
- Be sure the device is on.
- The paper is jammed before printing.The paper is jammed during printing.
- Turn the device off and on again then paper is ejected automatically.
- If above solution does not work, open the cover. Then insert the photo cartridge again. At first remove the photo cartridge, and then gently pull the remaining photo paper out of the Insertion part of Photo cartridge. At this time, be careful not to touch the inside of the Insertion part of Photo cartridge.
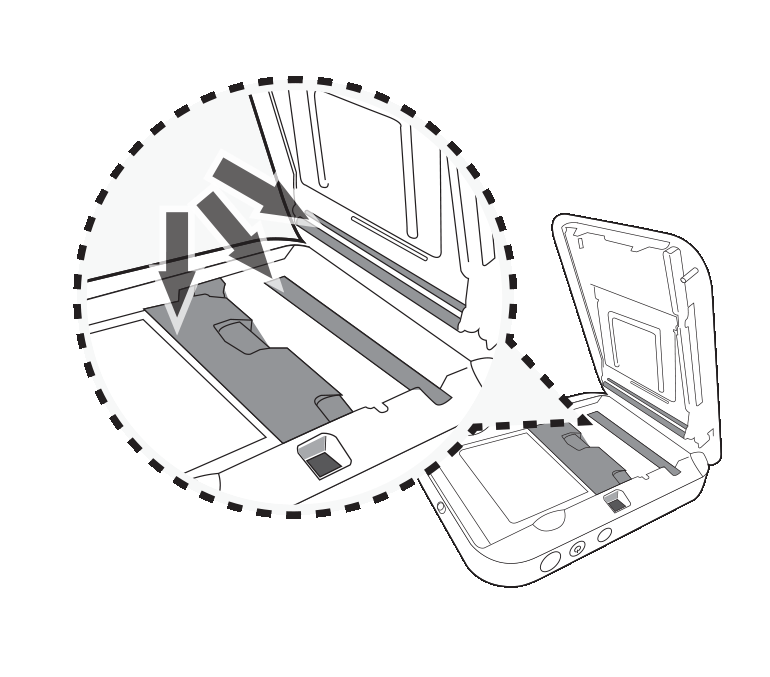
- The printed photo has lines.No or incomplete image is printed.
- If there are foreign substance
or dust on the inside of
the Insertion part of Photo
cartridge (print head), printed
photo may has lines.
In that case, wipe the foreign
substance of the head a cotton
bud or a soft cloth. And then try
again. Clean the part indicated
in the following picture.
- The edge of the image on the photo is cut off.
- Set Print mode to [Image Full] in the App’s setting then the image is printed as a whole.
- White space appears at the edge of the paper..
- When print mode is set to [Image Full] , white space may appears if the aspect ratio of the paper and your image is not the same. When print mode is set to [Paper Full] , the edge of the image can be cut off or white space at the edge of the paper may appear.
- Quality of printed photo is too low.
- In case you magnify an image using [
 ] menu in the App,
the quality of the printed photo
may be reduced.
] menu in the App,
the quality of the printed photo
may be reduced. - Turn off the Pocket photo and insert the new photo cartridge.
- Be sure the photo size is bigger than the proper resolution. (2560 x 1920 pixels)
- If you use other company’s photo paper, it cannot be guaranteed for print quality or damage of pocket photo.
- Device does not print.
- Preheating is needed. Wait for about 2 minutes.
- Be sure there are papers in the device.
- It may take time to print a photo.
- Be sure the photo file is less than 10 MB. Only baseline JPEG, PNG (Max: 1350x1050) format is supported.
- Device is turned off automatically.
- Check [Automatic Device Power Off] time in the App’s setting.
- Above solutions do not work.
- Press Reset hole with a pointed thing like mechanical pencil to initialize.
- The printed photo is out of focus by taking photo.
- Take a photo with a distance of at least 0.5 m between you and your subject.
- Clean the lens.
- When you take a photo, press the shutter button slowly after grab the Pocket photo with both hands and hold your elbows at your body..
- The picture is blurred.
- Do not press onto or fold the photo paper.
- Do not block the paper exit slot with your finger.
- The photo you printed is too dark by taking photo.
- Keep a distance from the subject of at least 0.5 m. Optimal distance for taking photo is approximately 1.5m.
- Take a photo with the light behind you.
- The printed photo is different from the image viewed through the viewfinder.
- Keep your eyes close to the viewfinder when taking photos. Then confirm the desired composition of the image and takin a photo. (Viewfinder eyepiece distance: 10 mm)
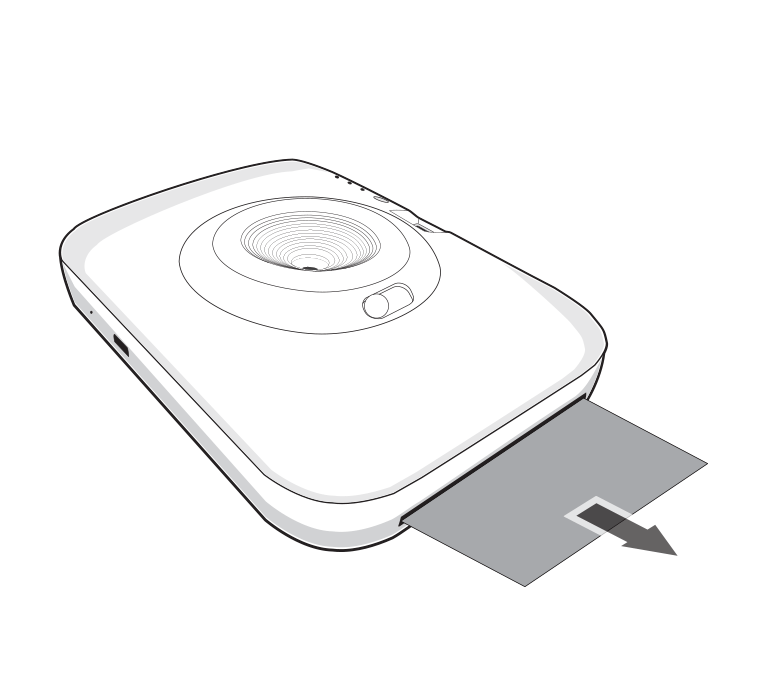
Paper Jam Solution
Do not pull the paper out. Turn the device off and on again, the paper will be ejected automatically.
Paper Jam Solution
1.
Slide the cover button sideways to open the bottom cover and then remove the photo cartridge.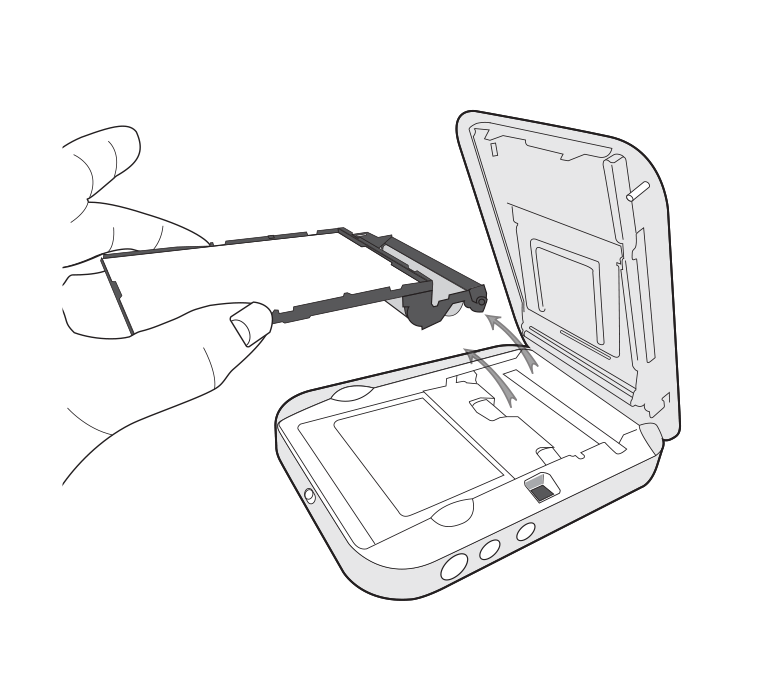
2.
Gently pull the remaining photo paper out of the Insertion part of Photo cartridge.